OK, so you’ve chosen a GPS, based on the last post and you’ve taken a walk with it and are itching to look at what you’ve done. There are so many sites now offering advice, mostly for Windoze of course and mostly for proprietary or shareware programmes, I thought I’d just quickly say what I’ve started to use since going down the Linux line for as much as I can possibly do.
GPSBabel
The core of any downloading and file conversion you should do is GPSBabel. This is a fantastic programme and will run on everything (Windoze, Mac, POSIX). Look for it in the repos. It will cope with hundreds of file formats for tracks, routes and waypoints and translate between them. I save everything as GPX. This is a horribly bloated way of storing tracks but it means that I then have my files in a format I can visualise on most programmes I am interested in. GPSBabel is a command line only programme though. If you’re like me and find those long commands hard to remember, you’ll be needing a GUI.
Gebabbel
…is what you want, an acceptably user-friendly face for GPSBabel. I can only vouch for it under Ubuntu, but the site says it is also available for the other, lesser OSs. You might need to know where your GPS is under Linux (the address) for Gebabbel to download your tracks from your GPS. Mine usually hides out under /dev/ttyUSB0 (that’s a zero at the end, by the way). A good way to find out is to plug your GPS in, get a terminal window up and type in dmesg at the prompt. Towards the bottom should be an entry like
[ 3394.972645] usb 4-1: pl2303 converter now attached to ttyUSB0.
In this case, the gateway between my Garmin eTrex is the serial-to-usb adapter I have from prolific – hence the pl2303.
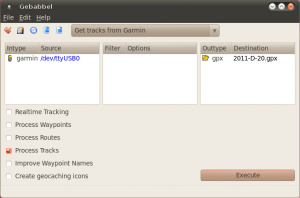
Gebabbel Screenshot
Once you’ve got a GPX file, what do you do with it? It’s not very pretty in its own right:
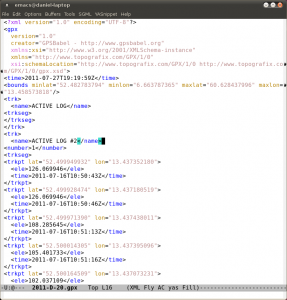
Looking at a GPX file in Emacs for what it is
Viking
A very nice programme for visualising and editing GPX tracks is Viking. There’s an old version (which I can vouch for) in the repos or you can download a later one from the site. Once you’ve installed it, you should be able to right click a GPX file and ‘Open with…’ Alternatively, just fire it up and ‘Open’ a GPX file. Don’t be tempted to ‘Add’ it as a ‘New GPS layer’ – this isn’t what they mean (this is to attach a GPS to your machine and do some real time tracking). One feature that is wonderfully useful is the ability to put an OpenStreetMap behind your GPS tracks in order to locate your traces or just check on accuracy. I use it all the time myself and in workshops. You can easily edit tracks too, which is handy for me when I want to clean up the wild jumps the GPS sometimes records due to multipath effects or some such.
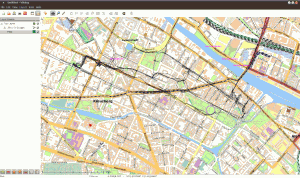
Visualising GPX tracks in Viking with an OpenStreetMap layer behind
QGIS
Or Quantum GIS is a very powerful programme indeed and one that I’ve only just really started to play with. It is aimed at people who really want to get down with Geographical Information Systems and as such, is beyond what one needs to simply look at some GPX tracks. However, if like us, you want to control how you present your tracks in terms of scale, projection, line etc etc, you need to take a deep breath and get to grips with something like this. Even a beginning tutorial is outside of the scope of this blog (beside, there are plenty on the QGIS site) but if you want to just quickly look at a GPX file, you want to ‘Add a Vector Layer’ under the ‘Layer’ menu and select your GPX file (TIP: when you browse for the file, make sure you have either ‘All Files’ or GPS eXchange Format [GPX] [OGR]’ selected at the bottom of the open dialogue box. At the ‘Select vectors to add’ dialogue, click the line with the Layer Name ‘tracks’ and Geometry Type ‘MultiLineString’.
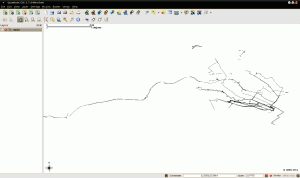
Qgis showing my most recent GPS tracks in WGS84 projection
You will probably begin by looking at it in WGS84 projection which is horribly squashed to us Northern Europeans, so to look at it in a more familiar projection, go to ‘Settings > Project Properties’ and tick ‘Enable ‘on the fly’ CRS transformation’ and then find ‘Google Mercator’ under ‘Projected Coordinate Systems>Mercator’. Your tracks might disappear – right click on the ‘tracks’ in the Layers list (to the left of the map view) and select ‘Zoom to layer extent’. They should reappear and you can scroll and resize to where you were. Looks better doesn’t it? Not only that, but the scale bar is now in understandable metres rather than obscure degrees.
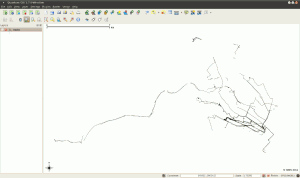
The same tracks as above viewd in Google Mercator projection


